Before I went on vacation I read about this mask on some of the blogs that I read on a regular basis. It was one of those free samples when you bought something in +Sephora and I thought it would be good to try since the reviews I read were amazing. Okay so just to hear about the brand-- Peter Thomas Roth is a great higher end skincare line that you can find in +Sephora and I believe +ULTA Beauty. Lately, I've really been into peels. I really liked the Dr Dennis Gross and I even got my mom addicted to that one. Its really good because its one that doesn't really sting your skin and you don't really feel it burning or anything when you use it but you do feel a difference and you can see a difference.
When I first say this mask, I wasn't really super excited to try this because I didn't think this was something that was going to work too well. I read the packaging and it says that this is a peel that is in a gel form that visibly rolls, lifts, sweeps away dead skin cells when massaged into skin. I had a feeling that this was going to be a little too strong for my skin because I am only 29 and I don't have those crazy wrinkles as of yet. When looking into the ingredients, this peel has multiaction enzymes which are natural like pomegranate, pineapple and keratinase. There is also cellulose in it that effectively peels and helps uncover the first layer of skin which will make you skin smooth, fresh and have a new complexion without drying, irritate or cause undue stress to your skin. After all this peeling all you are left with is youthful and radiant looking skin.
I decided to give it a try at first the liquid is like it said a gel but more of a watery gel and you smooth it over your skin. The instructions say to leave it on from 1-5 minutes so I left it on for 5 minutes and then you begin to rub it into your face with circular motions and immediately you see that something is rubbing off. It doesn't look like skin or anything. It looks like the actual gel is just balling up and nothing really crazy. It doesn't sting or anything. Once I rubbed my face for about a minute, I washed it off. I was ready to be disappointed because honestly nothing really happened. Then I dried my skin and felt it smoother than it was before. My nose didn't feel like it had blackheads in it. My cheeks were smoother. I was pleasantly surprised on how gentle this was. Gentle to me usually means ineffective so when I actually felt results, I was surprised.
This retails for $48 and you can find it in +Sephora or +ULTA Beauty in-stores and online. I definitely think its a great peel for all ages. Its gentle so I think its great for those who have sensitive skin since it was really gentle on my skin.
I will review anything and everything beauty related!! Hope you enjoy!
Showing posts with label natural. Show all posts
Tuesday, June 17, 2014
Tuesday, June 10, 2014
Tips for Tea Tree Oil
Once and a while I love to give home remedy type beauty tips. There are so many natural remedies out there that its hard to not use them. I've noticed that a lot of these types of remedies are usually 'old wives tales' but actually they work. My dad told me about how to use Baking soda and hydrogen peroxide to whiten my teeth and I also use it to whiten my nails. I wrote about it in one of my past posts. I also believe that your skin reacts to the food you eat so if you have acne prone skin, I recommend taking a deeper look at what type of foods you eat and anything bad for you also probably isn't good for your skin. I recommend swapping things out and also make sure you are keeping up on your water intake. If you do this and still have bad acne, go to the doctor.
Growing up in Puerto Rico, I used to go to the beach every weekend for like 5 months straight. Sometimes during the first few months going back to the beach after the long break of 'winter months' I would get sunburned if I went overboard and didn't really protect my skin which I never did when I was younger. There were times that I had horrible sunburns but one time I had gotten the worse one was one time I laid out and I guess the sun was REALLY bad that day and I ended up with blisters on my arm. Forget about the pain, once you put aloe on it the pain went away. I was more worried about days after when it cleared that I was going to get scars. This would have sucked since it was on my arm in plain view any time I wear short sleeves. My dad told me to put Tea Trea Oil on it every night. At first, I really didn't think anything was happening but by the end of 2 weeks the scar that could have formed was gone. I then went all crazy. I put it on a scar that I had on my knee and it helped minimize the marks as well. I was in love with this magic oil.
I started reading up on other possible uses for this magic oil and I saw that you can put a few drops of this into your shampoo and conditioner to clarify your hair of any build up. A lot of people don't think that their hair has build up maybe because they don't color their hair or that they don't use a lot of product in their hair but that isn't the only thing that causes build up. You can get build up with hard water. It is always good to wash your hair once a month or depending on how many times you wash your hair you can do it either once a week or twice a week or even once a month. As long as you are doing it frequently you should be good.
Those are what I use Tea Tree Oil for but you can also use it for cuts, burns, skin infections and other things like that. Before you use it, just google some stuff and see if its okay to use. But all in all its like coconut oil, you can basically use it for everything. Let me know if you use this for anything specific?
Growing up in Puerto Rico, I used to go to the beach every weekend for like 5 months straight. Sometimes during the first few months going back to the beach after the long break of 'winter months' I would get sunburned if I went overboard and didn't really protect my skin which I never did when I was younger. There were times that I had horrible sunburns but one time I had gotten the worse one was one time I laid out and I guess the sun was REALLY bad that day and I ended up with blisters on my arm. Forget about the pain, once you put aloe on it the pain went away. I was more worried about days after when it cleared that I was going to get scars. This would have sucked since it was on my arm in plain view any time I wear short sleeves. My dad told me to put Tea Trea Oil on it every night. At first, I really didn't think anything was happening but by the end of 2 weeks the scar that could have formed was gone. I then went all crazy. I put it on a scar that I had on my knee and it helped minimize the marks as well. I was in love with this magic oil.
I started reading up on other possible uses for this magic oil and I saw that you can put a few drops of this into your shampoo and conditioner to clarify your hair of any build up. A lot of people don't think that their hair has build up maybe because they don't color their hair or that they don't use a lot of product in their hair but that isn't the only thing that causes build up. You can get build up with hard water. It is always good to wash your hair once a month or depending on how many times you wash your hair you can do it either once a week or twice a week or even once a month. As long as you are doing it frequently you should be good.
Those are what I use Tea Tree Oil for but you can also use it for cuts, burns, skin infections and other things like that. Before you use it, just google some stuff and see if its okay to use. But all in all its like coconut oil, you can basically use it for everything. Let me know if you use this for anything specific?
Labels:
conditioner,
hair,
hair care,
home remedies,
natural,
oil,
oils,
remedies,
shampoo,
skin,
skincare,
tea tree oil
Thursday, May 29, 2014
BAREMINERALS Bareskin Pure Brightening Serum Foundation
I finally decided to write about makeup. One of my most favorite parts of makeup is the foundation. I think that this is where your makeup starts. If your foundation is bad then it doesn't really matter what else you do everything else after that will be crap. I have oily skin as you may know if you've been reading along and you will know that since I have oily skin its just really hard for me to find foundation that will stop the oil and stay on all day. The oils of my skin usually make the makeup disappear. I do find that there are some that are too mattifying and just look caked on which is horrible but now in the summer I like my foundation to look flawless and natural which means I probably have to give up on the mattifying components.
Since I was in college I've first heard about BareMinerals makeup. Back then all they had were the powder foundations which I used religiously. I lived in Florida back then and for anyone who knows how it is down there you know that its sunny, humid, and hot all the time. I was able to keep my skin looking flawless with this makeup. I don't know why I stopped using it but I did and moved on to other products. Once I saw that BareMinerals came out with a liquid foundation I was very excited to try it. I didn't get it the day it came out but after seeing all the reviews I was able to see that it was definitely a must try. I went ahead to my local +Sephora where the girls know me and picked mine up. I went through a bunch of colors and settled on 08 which is Bare Beige. This foundation has everything I love in one foundation--brightening serum.. SAY WHAT?!? In a foundation? How is that possible? I was ecstatic to try this out. This foundation is suppose to be tone-correcting mineral foundation and skincare serum in one. Now this is music to my ears.

It was created to be pure and ultra thin on your face so that you don't feel like you even have anything on which was just like their regular mineral powder foundation. It has skin perfecting fluid that you can use for buildable coverage. Since the coverage is buildable it has a natural finish to it that allows to let your skin shine through but in a beautiful way and nothing too cakey but enough coverage where you are able to cover-up any imperfections. This will make your skin look brighter and more youthful which for me are all good things to have from a foundation. I tried this on and I am very happy that I bought it. I am in love with anything BareMinerals and I am not sure why I don't buy more of this brand. I definitely recommend this foundation. It retails for $29 and that is not that much since you don't use a lot of this per application. You can buy this at +Sephora in store or online. You can also get it in +Bare Minerals store fronts.
Since I was in college I've first heard about BareMinerals makeup. Back then all they had were the powder foundations which I used religiously. I lived in Florida back then and for anyone who knows how it is down there you know that its sunny, humid, and hot all the time. I was able to keep my skin looking flawless with this makeup. I don't know why I stopped using it but I did and moved on to other products. Once I saw that BareMinerals came out with a liquid foundation I was very excited to try it. I didn't get it the day it came out but after seeing all the reviews I was able to see that it was definitely a must try. I went ahead to my local +Sephora where the girls know me and picked mine up. I went through a bunch of colors and settled on 08 which is Bare Beige. This foundation has everything I love in one foundation--brightening serum.. SAY WHAT?!? In a foundation? How is that possible? I was ecstatic to try this out. This foundation is suppose to be tone-correcting mineral foundation and skincare serum in one. Now this is music to my ears.

It was created to be pure and ultra thin on your face so that you don't feel like you even have anything on which was just like their regular mineral powder foundation. It has skin perfecting fluid that you can use for buildable coverage. Since the coverage is buildable it has a natural finish to it that allows to let your skin shine through but in a beautiful way and nothing too cakey but enough coverage where you are able to cover-up any imperfections. This will make your skin look brighter and more youthful which for me are all good things to have from a foundation. I tried this on and I am very happy that I bought it. I am in love with anything BareMinerals and I am not sure why I don't buy more of this brand. I definitely recommend this foundation. It retails for $29 and that is not that much since you don't use a lot of this per application. You can buy this at +Sephora in store or online. You can also get it in +Bare Minerals store fronts.
Wednesday, May 14, 2014
Macadamia Natural Oil Flawless
Not sure if you have seen lately that there have been a lot of different brands coming out with a cleansing conditioner or a conditioning cleanser for your hair. It basically is a 2 in 1 shampoo and conditioner but not the ones that we are used to seeing when we were growing up. This is something that conditions your hair more and the ones that I've tried so far don't leave your hair feeling like yarn. If you read my post from yesterday, you know I received this product in the May Test Tube container.

I saw the Macadamia brand and automatically thought 'crap, I'm not going to like this because it will make my hair all gross and greasy'. I had to wash my hair so I decided to use this instead of my regular shampoo and conditioner. First of all, the instructions aren't really clear and I had to Google how to use it first. I wanted to make sure that I was actually doing this correctly.What you are suppose to do is wet your hair just like you would if you were going to wash your hair with shampoo and instead of using shampoo and conditioner, you use this. It says to use 2 pumps and just make sure that you rub it in your hair. It says to massage your scalp to make sure that it has a chance to cleanse from the root to the ends. You can add water just to make sure that you have enough to make sure it saturates your hair. I didn't leave it in for long, it says to massage it in for about 3 to 5 minutes. I probably did 3 and then went under the shower for about 10 minutes just to make sure I didn't have any residue left. I wanted to make sure that I didn't have any greasiness left. I was reading some reviews and some people said that it was greasy. For me it wasn't greasy.

So this Flawless 6 in 1 cleansing conditioner is suppose to refine hair texture and optimize the styling process. It claims to cut the blow drying process in half. I can tell you that I don't think it cut my blow drying process in half not even a quarter. It usually takes me 20-25 minutes and I think it took me about the same amount of time. Now it did give my hair a nice shine to it. The ends don't look as frayed even though they aren't really frayed but since I don't really spend a lot of time blow drying my hair sometimes the looks a bit rough. I do blow dry my hair at night so I figured once I slept on it, my hair in the morning would be greasy but to my surprise it wasn't at all. Actually, today is probably one of the best days to try this out since its 93% humidity today and I have to say that my hair isn't weighed down nor is it frizzy. I honestly wanted to hate this stuff but I can say that this is definitely a good buy.
One thing I want to bring up is that I didn't buy this separately. I got it in the Test Tube May edition so I didn't know how much it retailed for until I researched it. I saw that the little bottle that I got retails for $15 and the bigger bottle retails for $30. Now thats a lot of money but if you think about it, its really replacing your shampoo and your conditioner. I haven't used this enough to see how many uses I get out of the $15 bottle so I can't really say if its REALLY worth it but I do like the product.

I saw the Macadamia brand and automatically thought 'crap, I'm not going to like this because it will make my hair all gross and greasy'. I had to wash my hair so I decided to use this instead of my regular shampoo and conditioner. First of all, the instructions aren't really clear and I had to Google how to use it first. I wanted to make sure that I was actually doing this correctly.What you are suppose to do is wet your hair just like you would if you were going to wash your hair with shampoo and instead of using shampoo and conditioner, you use this. It says to use 2 pumps and just make sure that you rub it in your hair. It says to massage your scalp to make sure that it has a chance to cleanse from the root to the ends. You can add water just to make sure that you have enough to make sure it saturates your hair. I didn't leave it in for long, it says to massage it in for about 3 to 5 minutes. I probably did 3 and then went under the shower for about 10 minutes just to make sure I didn't have any residue left. I wanted to make sure that I didn't have any greasiness left. I was reading some reviews and some people said that it was greasy. For me it wasn't greasy.

So this Flawless 6 in 1 cleansing conditioner is suppose to refine hair texture and optimize the styling process. It claims to cut the blow drying process in half. I can tell you that I don't think it cut my blow drying process in half not even a quarter. It usually takes me 20-25 minutes and I think it took me about the same amount of time. Now it did give my hair a nice shine to it. The ends don't look as frayed even though they aren't really frayed but since I don't really spend a lot of time blow drying my hair sometimes the looks a bit rough. I do blow dry my hair at night so I figured once I slept on it, my hair in the morning would be greasy but to my surprise it wasn't at all. Actually, today is probably one of the best days to try this out since its 93% humidity today and I have to say that my hair isn't weighed down nor is it frizzy. I honestly wanted to hate this stuff but I can say that this is definitely a good buy.
One thing I want to bring up is that I didn't buy this separately. I got it in the Test Tube May edition so I didn't know how much it retailed for until I researched it. I saw that the little bottle that I got retails for $15 and the bigger bottle retails for $30. Now thats a lot of money but if you think about it, its really replacing your shampoo and your conditioner. I haven't used this enough to see how many uses I get out of the $15 bottle so I can't really say if its REALLY worth it but I do like the product.
Labels:
6 in 1,
conditioner,
drugstore,
hair,
hair care,
haircare,
macadamia oil,
natural,
review,
sample,
shampoo
Tuesday, May 6, 2014
Tips on Whitening your Nails
For those who know me, know that I am known for my nails. Yes I have an obsession but honestly now a days who doesn't. I think its like the "it" thing to do now is nail art. Everyone is doing them from celebrities to the "normal folk". I love doing my nails, its something that calms me down and it lets me be creative. I love how I can do my nails while watching a baseball game. Some questions I get are "how long does it take you to do that design?" I always answer back and say it does take time but I watch all the Yankees games. If I am home and there is a game on, I'm definitely watching them play. Usually now if its not a Yankees game I'm usually watching a Mariners game. These games are usually 4 hours long so if I'm not blogging like I'm doing now, I am doing my nails.
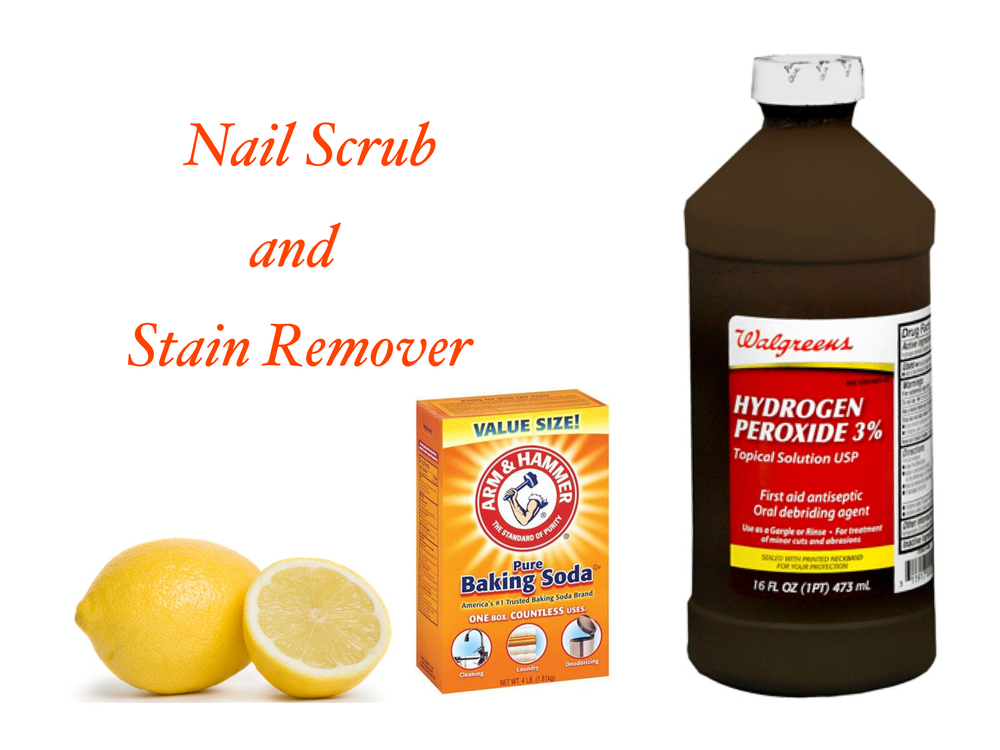
Being that I do my nails so many times a week and I usually like experimenting with different colors dark and light alike, my nails get stained. You can help avoid it a bit by always using a base coat which I always use but eventually, it doesn't matter. Eventually if you don't let your nails rest without polish, your nails will get stained. Mine are no different. So I always try to whiten them before I paint them again. To do this I started to do research and also took some tips from my Dad. Just as in any whitening toothpaste you will find baking soda and hydrogen peroxide. I figured it can't hurt to try this method. What you do is put baking soda into a little bowl and then add a little bit of hydrogen peroxide enough to make a paste with the mix. I then take the paste and rub it into my nails. I make sure to cover my nails completely on the top of my nails and on the under part of the nails. This will help the stain get removed from both areas. I take a nail brush and begin to brush the paste and I do this for about 5 minutes for each nail to make sure that I get enough of the mixture into my nails. For a boost of whitening-- you can add lemon juice. I usually just put the juice that comes in that little bottle that looks like a lemon but if you have a real lemon, that works as well. I honestly am not sure if one works better than the other so I just stick to the lemon juice in a bottle since I can preserve it better.
After this I soak my nails in the mixture for a little while longer and then I rinse. I usually do this right in the shower just so that if I make a mess its in the bathtub. I try to do this every time I remove my nail polish and before I do anything else to my nals. Maybe once every 2-3 months I will buff my nails with a very fine buffer. I do not like to do that all the time because it will make your nails weak since you are making them thinner. If you have nails that constantly break-- I would say that buffing them isn't an option. I don't recommend this at all. Another tip to making your nails strong is taking Biotin which will not only help your nails grow but its also for your skin and hair so its an all around beauty vitamin.
If you don't have really bad set in stains but you noticed that after you painted your nails
red or some other dark color and your nails got a bit stained, I recommend try first with whitening toothpaste. You can just squeeze out enough toothpaste to coat your nails and then take a nail brush and brush the toothpaste in while it foams, let it sit there for about 10-15 minutes. This should remove new stains that haven't really set in and were caused by just using a dark color. For something more serious like me, you may need to try the baking soda/peroxide mixture.
Do you have any tips to get your nails white? I would love to hear if there are different things that work. Let me know, I am always willing to try new things.
Being that I do my nails so many times a week and I usually like experimenting with different colors dark and light alike, my nails get stained. You can help avoid it a bit by always using a base coat which I always use but eventually, it doesn't matter. Eventually if you don't let your nails rest without polish, your nails will get stained. Mine are no different. So I always try to whiten them before I paint them again. To do this I started to do research and also took some tips from my Dad. Just as in any whitening toothpaste you will find baking soda and hydrogen peroxide. I figured it can't hurt to try this method. What you do is put baking soda into a little bowl and then add a little bit of hydrogen peroxide enough to make a paste with the mix. I then take the paste and rub it into my nails. I make sure to cover my nails completely on the top of my nails and on the under part of the nails. This will help the stain get removed from both areas. I take a nail brush and begin to brush the paste and I do this for about 5 minutes for each nail to make sure that I get enough of the mixture into my nails. For a boost of whitening-- you can add lemon juice. I usually just put the juice that comes in that little bottle that looks like a lemon but if you have a real lemon, that works as well. I honestly am not sure if one works better than the other so I just stick to the lemon juice in a bottle since I can preserve it better.
After this I soak my nails in the mixture for a little while longer and then I rinse. I usually do this right in the shower just so that if I make a mess its in the bathtub. I try to do this every time I remove my nail polish and before I do anything else to my nals. Maybe once every 2-3 months I will buff my nails with a very fine buffer. I do not like to do that all the time because it will make your nails weak since you are making them thinner. If you have nails that constantly break-- I would say that buffing them isn't an option. I don't recommend this at all. Another tip to making your nails strong is taking Biotin which will not only help your nails grow but its also for your skin and hair so its an all around beauty vitamin.
If you don't have really bad set in stains but you noticed that after you painted your nails
red or some other dark color and your nails got a bit stained, I recommend try first with whitening toothpaste. You can just squeeze out enough toothpaste to coat your nails and then take a nail brush and brush the toothpaste in while it foams, let it sit there for about 10-15 minutes. This should remove new stains that haven't really set in and were caused by just using a dark color. For something more serious like me, you may need to try the baking soda/peroxide mixture.
Do you have any tips to get your nails white? I would love to hear if there are different things that work. Let me know, I am always willing to try new things.
Friday, May 2, 2014
Aveeno® Positively Radiant® Brightening Cleanser
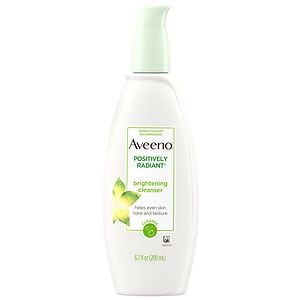
I needed to buy a new cleanser and this time I wanted to stay away from ones that had extra exfoliating elements. I just feel that since I use my +Clarisonic I don't really need to a cleanser that is harsh. I wanted drugstore because I guess I just didn't want to spend the extra money for one of the more expensive brands in like Sephora. After looking around at all the different brands, I went with Aveeno which is a great brand. This specific cleanser I purchased was part of their Positively Radiant collection. Its the brightening cleanser which we all know if you follow me is that I love anything and everything that makes me look like I have a radiant glow to my skin. Honestly since I am almost hitting 30, I am more worried about my skincare than actual makeup. My philosophy is that if the foundation isn't good, anything you build on top of it will just not look good so I figured I need to preserve my skin now that its still young-ish looking.
This cleanser is suppose to help improve your skin tone, texture and clarity to reveal brighter, more radiant skin. Everything about that description says I need to have this now. Who doesn't want brighter more radiant skin? Crazy people! Aveeno is a great brand because they are all for the natural so in this cleanser it has soy extract that is good with moisturizing the skin. The cleanser will remove dirt and makeup without over-drying. I personally do not have a problem with a cleanser being too harsh but for those of you out there that have sensitive skin, this cleanser is gentle enough to use every day twice a day. Its oil free, hypoallergenic and noncomedogenic. This is a given with this brand which is why I love it so much.
When you dispense the cleanser on your hands, you see that it has an opal color to it. If you put it to the light it will have this opal radiance to it which is gorgeous for a cleanser. It doesn't have a harsh smell to it. Nothing too much, it is mostly non scented. But its really gentle and it does feel like its washing my face. I apply it on my face first and then go in with the Clarisonic so I can get a deeper clean. I've been using this for about a week now and I love how my face is looking so far. This retails for about $6 or $7 which isn't that much compared to some of the other cleansers you will find in +Sephora or other department stores.
Do you have any new cleansers that you decided to try and ended up loving it?? Let me know I would love to try them!
This cleanser is suppose to help improve your skin tone, texture and clarity to reveal brighter, more radiant skin. Everything about that description says I need to have this now. Who doesn't want brighter more radiant skin? Crazy people! Aveeno is a great brand because they are all for the natural so in this cleanser it has soy extract that is good with moisturizing the skin. The cleanser will remove dirt and makeup without over-drying. I personally do not have a problem with a cleanser being too harsh but for those of you out there that have sensitive skin, this cleanser is gentle enough to use every day twice a day. Its oil free, hypoallergenic and noncomedogenic. This is a given with this brand which is why I love it so much.
When you dispense the cleanser on your hands, you see that it has an opal color to it. If you put it to the light it will have this opal radiance to it which is gorgeous for a cleanser. It doesn't have a harsh smell to it. Nothing too much, it is mostly non scented. But its really gentle and it does feel like its washing my face. I apply it on my face first and then go in with the Clarisonic so I can get a deeper clean. I've been using this for about a week now and I love how my face is looking so far. This retails for about $6 or $7 which isn't that much compared to some of the other cleansers you will find in +Sephora or other department stores. Do you have any new cleansers that you decided to try and ended up loving it?? Let me know I would love to try them!
Sunday, April 13, 2014
Aspirin Mask
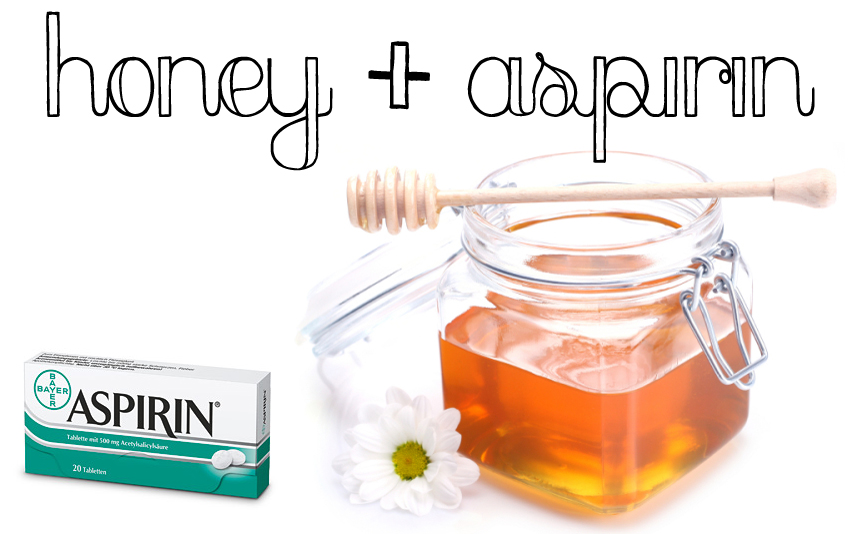
I know you are all probably reading this thinking, what is this girl thinking with aspirin as a mask. I have to day I read a quick article that were talking about home remedy beauty products and I figured I'd give one a try. I've read in the past that if you crush up some aspirin and put it on a pimple it will clear it up right away. I honestly don't ever believe that hype because I've used almost every spot treatment out there and nothing worked. I've used the Kate Somerville EradiKate Acne Treatment,Neutrogena On-the-Spot Acne Treatment etc and nothing has worked. Now I do not get acne per say but I can say that every so often I do break out. It's more of a hormonal thing, during that time of the month. So I saw I was getting that one usual pimple a month and since I has read about this I went ahead and googled aspirin masks and I figured I'd try one. I saw one that was easy and all it is is Aspirin, distilled water and honey if you want to make sure you don't over dry your skin. Honey is really good for your skin either way, I usually just put some honey in my face before I take a shower so that it hydrates it and smooths it.
I did my mixture, I used store brand aspirin about 8 pills and dissolved it into a little bit of water. You want to make sure that the texture is more paste like that watery. Once that's all dissolved, I add a bit of honey which I use a little not more that needed to make sure that the mixture is easier to spread onto my face. Once it's all mixed up, I take a foundation brush that I use only for mask application and I slather it on. I start at the area where my pimple is and then I just went ahead and did the whole face and neck area avoiding my eyes and mouth, duh! I left it on for about 10 minutes and rinsed it off with a wet wash cloth. I did see my skin was exfoliated but not to the point where it was overly dry. I noticed immediately that the pimple went down. I honestly didn't even where it was and to actually see where it was, I needed to feel for it with my finger. It's been 1 day since I did the mask and the pimple is completely gone. The reason I knew this was going to work was because saw immediate results once I rinsed the mask off. I'm hooked!
I totally recommend this to anyone who wants to have clearer skin or if you want something that is like a spot treatment. Please note: that if you are in any way allergic to aspirin, do not try this mask. This will give you the same allergic reaction as if you were ingesting it.
Do you have any homemade remedies that you use? Or are there some oldie remedies your mom or grandma told you and you swear by still? Let me know I am always up for hearing about new things people are doing.
Wednesday, April 9, 2014
Lush Solid Shampoos Review
Hi there! I wanted to talk about the Lush Solid Shampoos. I recently received these for my birthday from my dear friend +Carrie L. I know what you are probably thinking that shampoo shouldn't be in a solid form since shampoo should be lathering. I have to tell you skeptics out there, this shampoo has such a rich lather. Lush has many different types of shampoos that you can choose from so you can definitely get one that works with your hair type. My hair is henna colored with the Lush henna dye and along with that I have really thin hair but it tends to be on the oily side which is no surprise since my skin is always oily.
I use these shampoos every other time that I shampoo so that my hair doesn't get accustomed to it and get dull. This usually happens with any shampoo doesn't matter what I do, if I use it for a long enough time, my hair stops reaping any benefits. All I do is wet my hair and then I take the shampoo and rub it on my hair. I start with the roots and then I run it down to the ends. I keep the bar of soap in my hand until I get enough of the product that makes it lather to my liking. I then rub the shampoo as you would any other shampoo and I rinse then I go at it again. I always shampoo my hair twice since its oily and I feel that it helps get the oil out of my hair without stripping it. I then go in with conditioner at the ends so that my ends are conditioned and then thats it. I rinse and dry my hair.
My hair comes out so shiny and doesn't get oily as much as with other shampoos that I buy. This is all organic and vegan and natural. I love all Lush products and these are great for everyone. These are great for people that travel a lot and hate hotel shampoos or like me, my hair is so long that it takes more than what we get in those little vials and for traveling, its a pain to carry my own shampoo since I can't put my luggage in carry on. These range from $10-11 and you can get them at your local Lush store or online. They are a good deal since these last way longer than bottled shampoo. I use one complete bar every 6 or 7 months maybe more. My hair is really long too (like 2 inches from my waist) and I wash my hair at least twice or 3 times a week. All in all I definitely recommend these shampoos and there are different varieties so there is one that will work for you. They are so fragrant too so get ready for great aroma therapeutic shampooing experience.
I use these shampoos every other time that I shampoo so that my hair doesn't get accustomed to it and get dull. This usually happens with any shampoo doesn't matter what I do, if I use it for a long enough time, my hair stops reaping any benefits. All I do is wet my hair and then I take the shampoo and rub it on my hair. I start with the roots and then I run it down to the ends. I keep the bar of soap in my hand until I get enough of the product that makes it lather to my liking. I then rub the shampoo as you would any other shampoo and I rinse then I go at it again. I always shampoo my hair twice since its oily and I feel that it helps get the oil out of my hair without stripping it. I then go in with conditioner at the ends so that my ends are conditioned and then thats it. I rinse and dry my hair.
My hair comes out so shiny and doesn't get oily as much as with other shampoos that I buy. This is all organic and vegan and natural. I love all Lush products and these are great for everyone. These are great for people that travel a lot and hate hotel shampoos or like me, my hair is so long that it takes more than what we get in those little vials and for traveling, its a pain to carry my own shampoo since I can't put my luggage in carry on. These range from $10-11 and you can get them at your local Lush store or online. They are a good deal since these last way longer than bottled shampoo. I use one complete bar every 6 or 7 months maybe more. My hair is really long too (like 2 inches from my waist) and I wash my hair at least twice or 3 times a week. All in all I definitely recommend these shampoos and there are different varieties so there is one that will work for you. They are so fragrant too so get ready for great aroma therapeutic shampooing experience.
Friday, March 28, 2014
Lush Henna Dye in Caca Rouge Review
Now for a little hair talk. I have very long hair and the texture of my hair is a lot of thin hair and its wavy/straight. I always look for products that would help reduce grease and also help with volume since I need something in my hair to give it life. I've been dying my hair since I was 14 around 8th grade. I convinced my Mom to convince my Dad in letting me get highlights and from there it spiraled into a never ending adventure to get different hair colors. It was all done with the harsh chemicals and so at the age of 29, I've realized that I need to be healthier with my hair. So I saw this Henna hair dye in Lush. There are 4 colors available and I picked the red one Caca Rouge and I right away went into reading reviews and looking at Youtube videos to see how well this hair dye is on darker hair. I think I read about 100+ reviews and I was just a bit scared since I've never really used Henna like this before to dye my hair and the description says FIREY RED, I was a bit scared. I read and read and it never said that my hair color was going to turn into an orange mess and that was logical since its Henna with no chemicals like bleach which is what would turn a natural dark brown haired girl into Carrot Top. I was ready to breath and start the process.
Now the process in itself is a pain, especially with hair thats almost down to your butt. The henna comes in a brick and first of all you have to grate it with a cheese grater which is a pain. Depending on the length of your hair, you use a certain amount of blocks but my hair is so long, I went ahead and threw the whole 6 blocks in. After its all grated and into a powder form, you have to them pour boiling hot water into it. I added lemon, paprika and cinnamon. The lemon to help lighten my hair since its a deep brown and paprika and cinnamon for color and smell. You have to put enough water in it to make like a muddy consistency, like brownie mix. Once you mix the mud and the mixture isn't going to be boiling hot so don't worry about burning yourself.
Once the the mixture is done, you want to start the application in your hair. Its easier to apply if you section your hair. You need to make sure that you get the roots to the ends. After the whole head if covered, you have to then wrap your hair with saran wrap and this is so that the red color of the Caca Rouge can deepen. It says to leave it for 2 hours but once I read online a lot of people were leaving it for about 7+ hours. I left mine in for 8 or 9 hours just because my hair being so dark that I wanted to make sure that the red shines through. This mask once you get to the 6th and 7th hour it gets really heavy. Then you can rinse it out. When you begin to rinse it out, you will see that it is gritty. It takes a long time for the henna to wash out. I would first rinse all of it out first and then shampoo it about 2 or 3 times. Again, my hair is very long so for someone who has shorter hair, might have an easier time to rinse it out.
Since the henna has all good things for your hair such as cocoa butter and the henna in general conditions your hair so good. Once I rinsed it out and blow dried my hair, my hair had a reddish hue and it was so conditioned. It really does do a great job for my hair and even though its a lengthy process, I would definitely keep doing it to my hair. I've done it twice already and my hair is really shiny now and it doesn't look dry anymore and the ends aren't brittle. This retails for $24.95 which is not bad especially if you get your hair done professionally and the best thing is that its actually good for your hair unlike anything else that you put in your hair to dye it.
Now the process in itself is a pain, especially with hair thats almost down to your butt. The henna comes in a brick and first of all you have to grate it with a cheese grater which is a pain. Depending on the length of your hair, you use a certain amount of blocks but my hair is so long, I went ahead and threw the whole 6 blocks in. After its all grated and into a powder form, you have to them pour boiling hot water into it. I added lemon, paprika and cinnamon. The lemon to help lighten my hair since its a deep brown and paprika and cinnamon for color and smell. You have to put enough water in it to make like a muddy consistency, like brownie mix. Once you mix the mud and the mixture isn't going to be boiling hot so don't worry about burning yourself.
Once the the mixture is done, you want to start the application in your hair. Its easier to apply if you section your hair. You need to make sure that you get the roots to the ends. After the whole head if covered, you have to then wrap your hair with saran wrap and this is so that the red color of the Caca Rouge can deepen. It says to leave it for 2 hours but once I read online a lot of people were leaving it for about 7+ hours. I left mine in for 8 or 9 hours just because my hair being so dark that I wanted to make sure that the red shines through. This mask once you get to the 6th and 7th hour it gets really heavy. Then you can rinse it out. When you begin to rinse it out, you will see that it is gritty. It takes a long time for the henna to wash out. I would first rinse all of it out first and then shampoo it about 2 or 3 times. Again, my hair is very long so for someone who has shorter hair, might have an easier time to rinse it out.
Since the henna has all good things for your hair such as cocoa butter and the henna in general conditions your hair so good. Once I rinsed it out and blow dried my hair, my hair had a reddish hue and it was so conditioned. It really does do a great job for my hair and even though its a lengthy process, I would definitely keep doing it to my hair. I've done it twice already and my hair is really shiny now and it doesn't look dry anymore and the ends aren't brittle. This retails for $24.95 which is not bad especially if you get your hair done professionally and the best thing is that its actually good for your hair unlike anything else that you put in your hair to dye it.
Labels:
caca brun,
caca marron,
caca noir,
caca rouge,
dye,
hair,
hair care,
hair color,
haircare,
henna,
lush,
lush cosmetics,
natural,
vegan
Subscribe to:
Posts (Atom)